Verifying your business on online platforms and directories is crucial for establishing credibility, connecting with customers, and increasing visibility. Yet the verification process can often seem complicated and time-consuming.
This comprehensive guide will walk you through step-by-step how to verify your business on Google, Facebook, LinkedIn, Yelp, and more. We’ll also cover the benefits of verification, tips for streamlining the process, and recent verification requirements as of 2024.
Whether you’re just starting your verification journey or looking to update old verifications, use this as your go-to resource for verifying your business across the web. Let’s get your business verified!
Table of Contents
Why Verify Your Business?

Before jumping into the how-tos, let’s discuss why business verification is so important:
- Increased trust and credibility – Verification badges (like a blue checkmark) indicate your business is legitimate. This helps build customer trust.
- Better search visibility – Verified businesses may be given priority placement in maps/search.
- Access to more features – Many platforms restrict advanced tools and insights to verified accounts.
- Protect from false listings – Verifying claims your listing from competitors or fake profiles.
- Unified presence – Syncing info across verified profiles gives a consistent brand experience.
- More customer engagement – Verified profiles make it easier for customers to connect with your official brand presence.
Simply put verification signals to customers, search engines, and business platforms that your business is the real deal. This leads to better discoverability, transparency, and overall customer experience.
Also Read – Google My Business and SEO: The Complete Guide for 2024
Google Business Profile Verification
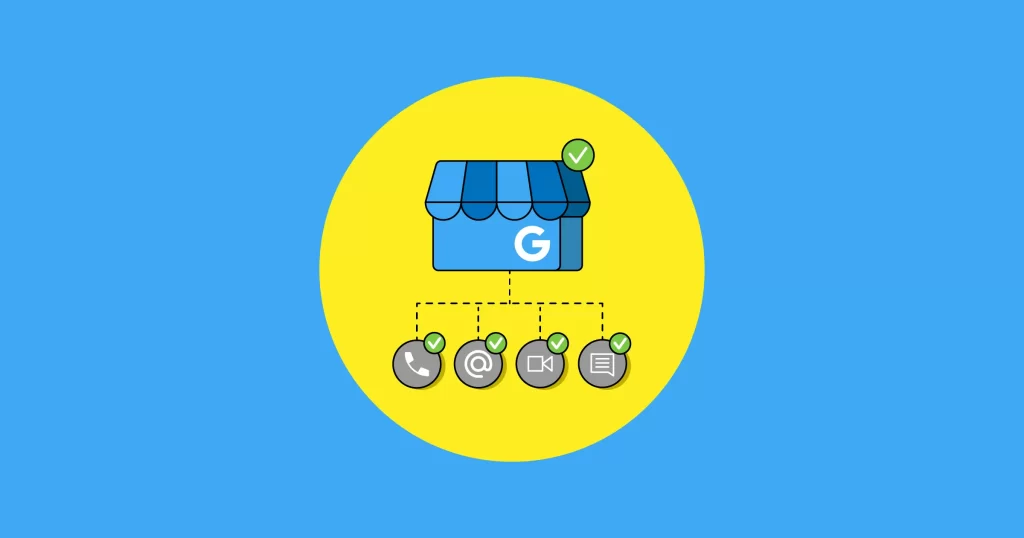
Verifying your business on Google should undoubtedly be a top priority. Here are the steps to verify your Google Business Profile (formerly Google My Business):
What You’ll Need
- Access to your Google Business Profile account.
- If you don’t have one, you’ll need to create a listing first.
- Your business address, phone number, website, and other key information.
Verification Process
- In your Google Business Profile, go to your listing’s dashboard and click Get Verified.
- Choose your preferred verification method:
- Email – Google will send a verification code to your business email. Enter this code within 7 days to verify.
- Phone – Google will call your publicly listed business phone number with a verification code to enter.
- Postcard – Google will mail a postcard with a code to your address. Enter this code when received. Allow 7-10 business days for delivery.
- Instant – Instant verification connects directly with select trusted business data sources to verify your listing in real-time.
- Bulk – Bulk verification allows agencies to verify multiple clients at once.
- Follow the instructions for your chosen method to receive and enter the verification code.
- The blue verified badge should now appear on your Google Business Profile!
Tips for Google Verification
- Double-check that your business information is accurate before attempting verification. Errors will delay verification.
- If instant verification fails, try another method. Often multiple options are needed for verification.
- Still, having trouble? Try verifying directly through Google Search Console.
- Facing verification issues? Check Google’s troubleshooting guide.
Benefits of Google Verification
Once verified on Google, your business can:
- Update listing info and add photos at any time.
- See search queries that led to your listing.
- Create and run local campaigns through Google Ads.
- Get priority placement in Google Search and Maps.
- Connect your posts to your listing through Google Posts.
- Stand out as legitimate against competitors.
- And more!
Google verification unlocks all the benefits of Google Business Profile, so it should be a top priority for establishing and growing your local presence.
Verifying Your Facebook Business
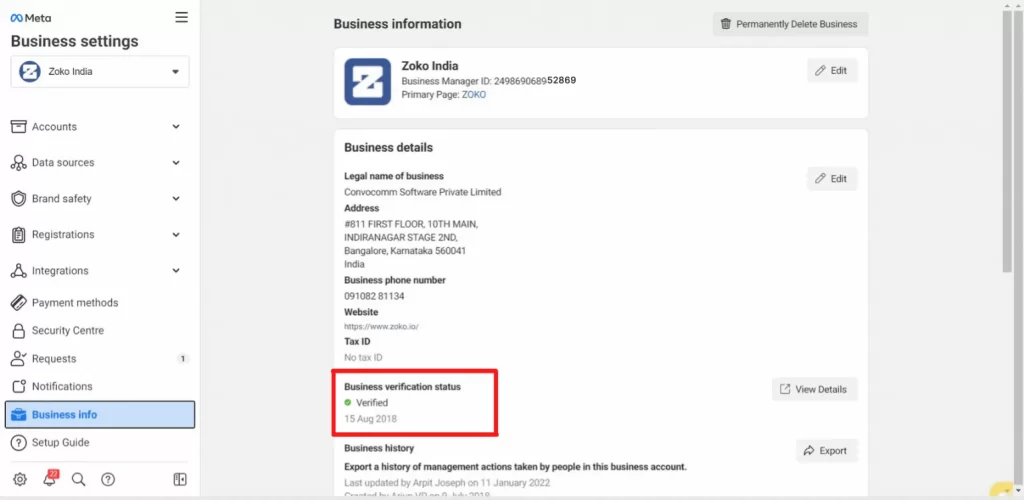
Facebook verification helps connect your business listing with your Facebook presence. Here’s how to get verified:
What You’ll Need
- Admin access to your business’s Facebook page.
- Admin access to your business’s Facebook ad account.
- Documentation verifying your business’s legal name, ownership, and operational address.
Verification Process
- From your Facebook page, click Settings > Page verification.
- Select Get Started under the Business Verification section.
- Choose method:
- Instant connects with trusted data sources to instantly verify.
- Documents allow uploading business licenses, registrations, or other docs proving ownership.
- Follow any additional steps based on your verification method. This may include entering codes, uploading files, connecting accounts, etc.
- Once approved, the blue verified badge will display on your Facebook page!
Tips for Facebook Verification
- Have all your business documents and account info ready before starting.
- If instant verification fails, document verification is typically the next step.
- Unsure what documents to use? Check Facebook’s recommended docs list.
- Stuck? See Facebook’s troubleshooting tips.
Benefits of Facebook Verification
A verified Facebook business page provides:
- Increased credibility and trust factors.
- Removal of impersonating or false pages.
- Access to expanded analytics like page views and Visitors’ posts.
- Ability to add commercial intent to ads.
- Authorization to use Facebook Pay and Shops.
- Eligibility for certain Facebook ad programs.
- And much more!
Verify on Facebook to tap into these tools for connecting better with customers.
Verifying Your LinkedIn Business
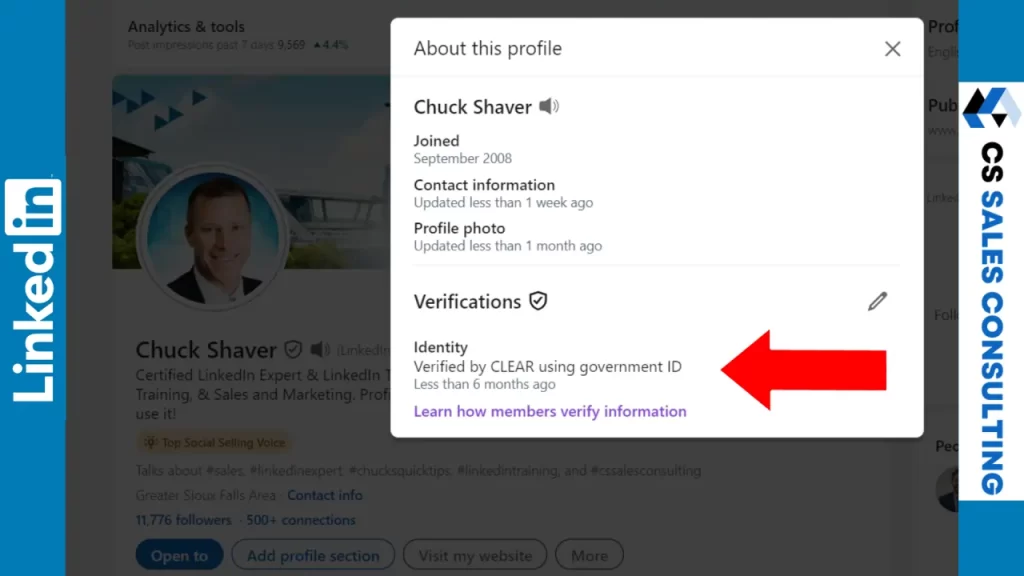
LinkedIn is key for brand awareness among professional audiences. Here are the steps to verify:
What You’ll Need
- Your LinkedIn Company Page created
- Legal business documentation like registration, license, etc.
Verification Process
- From your Company Page, click Admin Tools > Manage > Company Page Verification.
- Choose verification method:
- Instant connects with trusted databases to verify instantly.
- Document Review allows uploading business legal documents.
- Follow the instructions to connect data or upload files based on the method chosen.
- LinkedIn will review and confirm once verified.
Tips for LinkedIn Verification
- Have your business documents easily accessible before starting.
- If the instant fails, document review is typically the next route.
- Unsure what documents to upload? LinkedIn provides recommended docs.
- Stuck on a step? Check LinkedIn’s verification troubleshooter.
Benefits of LinkedIn Verification
Verification on LinkedIn brings:
- Increased visibility and exposure to relevant audiences.
- Promoted content options to grow your following and engagement.
- Advanced analytics into follower demographics, content performance, and more.
- Removal of misleading or fake brand pages.
- Ability to publish job openings directly on your page.
- And much more!
Verifying on LinkedIn should be a priority for reaching professional and industry networks.
Also Read – Google My Business: A Guide to Google Business Profile
Yelp Business Verification
Yelp Business verification comes in two flavors: claiming your business page and getting the Verified License badge. Here’s a breakdown of both:
Claiming your Business Page:
This is free and crucial for managing your listing’s accuracy and responding to reviews. Here’s how:
- Check if your page exists: Head to biz.yelp.com or the Yelp Business app and search for your business.
- Claim the page: If it’s unclaimed, follow the prompts to claim it using your email or phone number. This grants you ownership and edit access.
- Verify ownership: You’ll receive a verification code via phone call or text message, enter it to complete the claim.
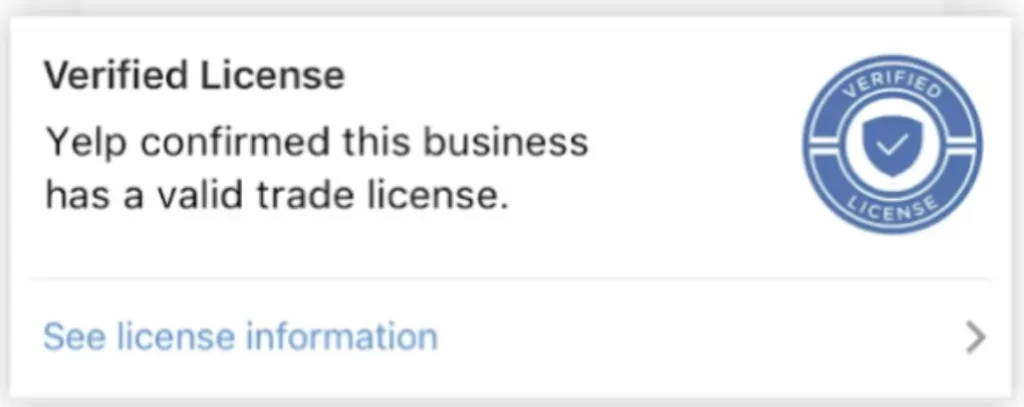
Verified License Badge:
This optional, paid feature displays a blue shield icon next to your business name, signifying verified trade licensing. Some requirements and benefits:
- Availability: Only offered to businesses in specific categories and regions. Check availability on your Yelp Business Account’s “Upgrade” section.
- Cost: It’s an add-on to Yelp advertising options.
- Verification process: Provide details like license number and issuing authority. Yelp staff review it for accuracy and good standing.
- Benefits: Increased trust and visibility for potential customers, with an average 10% boost in calls, clicks, and map views after verification.
Remember:
- Claiming your page is free and recommended for all businesses.
- Verified License is optional and requires paid advertising.
- Both options enhance your online presence and build trust with customers.
I hope this clarifies Yelp Business verification. If you have any further questions, feel free to ask!
Also Read – Not everyone gets a B2B Audience on LinkedIn Do